
7 min read
A braided rug made from old bed sheets is one of the most practical upcycling projects you can try. It turns worn sheets that would otherwise go to landfill into a sturdy, washable rug that lasts for years. The technique is the same three-strand braid you learned as a child, scaled up to rug size and stitched into a coil. No loom, no sewing machine, and no special tools are required. This guide shows you how to prepare the fabric, braid evenly, and sew the coil into a flat, durable rug.
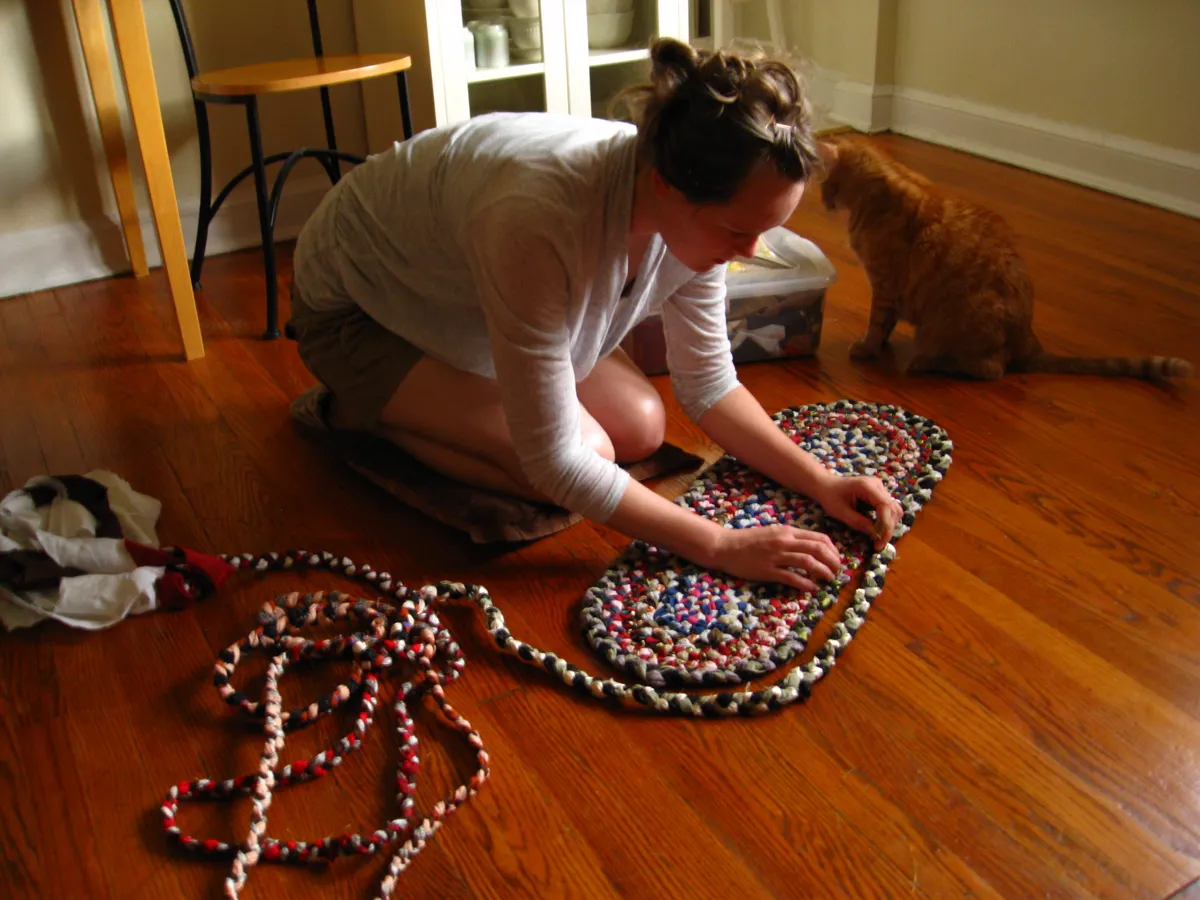
Sorting and Cutting the Sheets
Gather three to five old flat sheets in colors that look good together. White, cream, and pale patterns mix well, while a single bold color makes a strong statement rug. Wash and dry the sheets first, and cut away any thin spots, stains, or worn hems. Cut the sheets into long strips about six centimeters wide, following the grain of the fabric so the strips tear cleanly and evenly. You can tear the fabric by hand after snipping the starting point, which is faster than cutting and gives a soft, slightly frayed edge that blends nicely into the braid.
Join the strips into three very long strands by overlapping the ends and sewing a few stitches, or by tying small knots that will hide inside the braid. Each strand should be at least two meters long to start with, and you will add more strips as you braid. Sort the strips by color into three piles so you can control the color pattern of the rug. A rug with one color per strand gives a bold striped look, while mixing colors within each strand creates a speckled, scrappy effect. Roll each pile into a ball to keep the strips tangle-free while you work.
Making the Braid Strands
Fold each strip in half lengthwise with the raw edges tucked inside, and press the fold with a warm iron if you want a neat finish. Folding the strips gives the braid a rounded, cord-like look and hides the frayed edges. If you prefer a rustic, rag-rug texture, skip the folding and braid the flat strips as they are. Tie the three strands together at one end with a strong knot, and pin the knot to a cushion, a heavy book, or the arm of a chair so you can braid with both hands free. A firm anchor makes the braid tighter and more even.
Keep the tension consistent as you braid, pulling each strand snug but not so tight that the braid curls or puckers. Check your work every few centimeters by laying the braid flat on the table. A good braid lies flat and straight, while a braid that twists to one side means one strand is being pulled tighter than the others. When a strand runs short, overlap a new strip onto the end of the old one and sew a few stitches through both layers. The join will disappear inside the braid, and the rug will stay strong at that point.
Braiding Three Strands Together
Braid steadily until the braid measures about one meter, then stop and check the color pattern. The pattern should repeat evenly along the braid, with each color taking its turn on the outside. If one color dominates, you may have mixed up the strand order, which is easy to fix by unbraiding a few centimeters and starting again. Continue braiding, adding strips as needed, until the braid is long enough for the rug size you want. A small bedside rug needs roughly fifteen meters of braid, while a large living room rug can need forty meters or more. This is a slow, relaxing project, so braid in sessions rather than trying to finish it in one sitting.
Roll the finished braid into a loose coil and tie it with string so it does not tangle while you prepare to sew. Weigh the coil on a kitchen scale if you want to estimate how much more braid you need, since one meter of braid makes roughly the same area of rug each time. Lay the coil on the floor and measure the diameter to get a sense of the finished size. Remember that the rug will grow by about ten centimeters in diameter for every meter of braid you add at the outer edge. Stop braiding when the coil looks about right, and set the braid aside for the sewing stage.
Coiling and Stitching the Rug
Start at the center by coiling the first thirty centimeters of braid into a tight spiral and stitching the coils together with a curved upholstery needle and strong thread. Use a heavy-duty thread or waxed linen thread, since ordinary sewing thread will break under the weight of the rug. Pass the needle through both coils at each stitch, pulling the thread snug so the coils sit flush against each other. Work in a spiral, adding one round of braid at a time and stitching every two or three centimeters. Keep the rug flat on the table as you sew, and smooth out any bumps before stitching over them.
Turn the rug over every few rounds to check the back, which should look nearly as neat as the front. If a gap appears between two coils, add an extra stitch to pull them together. For a stronger rug, use a zigzag stitch on a sewing machine set to its widest width, which sews both coils together quickly and evenly. Hand sewing gives more control and a more traditional look, while machine sewing is much faster for a large rug. Either method works, so choose the one that suits your patience and your schedule. Continue until the braid runs out, then taper the last fifteen centimeters by trimming one strand at a time so the end blends smoothly into the edge.
Finishing Edges and Care
Finish the outer edge by folding the last few centimeters of braid under the rug and stitching it firmly in place. Tuck the raw ends underneath so no frayed fabric shows on the top or the sides. Press the finished rug with a warm iron on both sides, and let it lie flat overnight to settle into shape. A new braided rug may curl slightly at the edges at first, but it will relax and lie flat after a few days of use. Place a non-slip rug pad underneath to keep the rug from sliding on hard floors, and trim any loose threads that appear after the first wash.
Machine wash the rug in cold water on a gentle cycle, and air dry it flat to keep the shape. A braided sheet rug is surprisingly tough and can be washed many times, though the colors will soften gradually with each wash. Rotate the rug every few months so it wears evenly, especially if it sits in a sunny spot. With basic care, a rug made from old bed sheets can last for years and costs almost nothing to make. Once you have made one, you will look at every worn sheet as raw material for the next rug.
Do not stop here. More Fiber Arts ideas are waiting below, beginning with Tatting Lace Basics: Your First Doily in an Evening.
Reference: Bed sheets — Wikipedia
Related Articles:
- Tatting Lace Basics: Your First Doily in an Evening
- Hand-Dyed Yarn with Kool-Aid Colors
- Handwoven Coasters from T-Shirt Yarn
Tried this project?
Show us how yours turned out in the comments — your version might be exactly the inspiration another maker needs.
If this tutorial helped, share it with a fellow crafter.