
5 min read
Knitted draft stoppers are a simple way to keep cold air out and warm air in. They sit along the bottom of a door or window and block the gap where drafts sneak through. A knitted cover looks far better than a rolled towel, and it can be made to match any room. The project uses basic knitting skills and works up quickly on large needles.
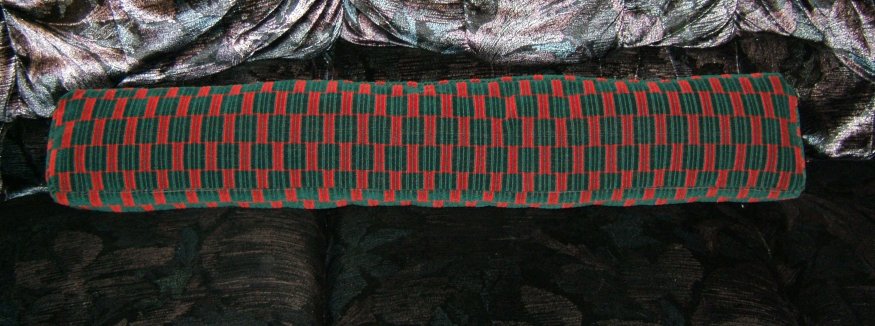
Start by measuring the door or window where the stopper will sit. A standard interior door is about thirty inches wide, while an exterior door may be thirty-six inches. Add two inches to the measurement so the stopper overlaps the frame slightly. The finished stopper should be plump and firm, not flat and floppy.
Choose a yarn that is thick and durable, since the stopper will sit on the floor and take some wear. Wool yarn holds its shape well and insulates effectively. A chunky or bulky-weight yarn works up fast and creates a dense fabric that blocks drafts. Dark colors hide dirt better than light colors, which matters for something that lives on the floor.
Choosing Yarn and Needles
Bulky yarn paired with size eleven or thirteen needles gives a firm fabric that still has some stretch. If you use thinner yarn, hold two strands together to reach the same thickness. Check your gauge with a small swatch before starting, since a stopper that is too narrow will not block the draft fully. A swatch also lets you test how the stitch pattern looks.
Pick needles that feel comfortable for long rows. Straight needles work fine for a flat panel, while circular needles hold a large number of stitches more easily. Metal needles slide smoothly, while bamboo needles grip the yarn and prevent stitches from slipping off. Choose the type that suits your knitting style and the yarn you picked.
Knitting the Cover
Cast on enough stitches to reach your measured length, then work in stockinette or garter stitch until the piece is wide enough to wrap around the filling. Garter stitch creates a bumpy texture that hides uneven tension, while stockinette gives a smoother look. Work the piece until it measures about ten inches wide, which wraps around a standard filling with room to spare.
Keep the edges even by slipping the first stitch of each row. This creates a neat edge that is easier to seam later. Count your stitches every few rows to catch mistakes early. A dropped stitch is easy to fix when you notice it right away, but much harder to repair after several more rows have been worked.
Shaping and Seaming
When the panel reaches the right size, bind off loosely so the edge does not pucker. Fold the panel in half lengthwise with the right sides together and seam the long edge using mattress stitch. The seam should be invisible from the outside. Leave one short end open so you can insert the filling, and seam it closed after the stopper is stuffed.
Turn the cover right side out and check the seam. Press the seam lightly with a warm iron if the yarn allows, which helps it lie flat. A well-seamed cover looks tidy and keeps the filling from escaping. If the seam feels weak, work a second row of stitching over it for extra strength.
Filling the Stopper
Fill the cover with a material that is heavy enough to stay in place. Dried rice, lentils, or sand sealed in a fabric tube all work well. A tube of filling prevents loose grains from escaping through the knit fabric. Pack the filling firmly but leave enough flexibility for the stopper to mold itself to the gap under the door.
For a softer stopper, use polyester fiberfill mixed with a small amount of weighted filling. The fiberfill keeps the shape plump, while the weight holds the stopper in place. Avoid overstuffing, since a stopper that is too rigid will not conform to uneven floors. Test the stopper against the door before seaming the end closed.
Finishing Touches and Care
Add a small loop at one end so the stopper can hang on a hook when not in use. A loop made from a short length of cord or a crocheted chain works well. You can also add a button or a decorative tassel for a handmade touch. Keep decorations flat so the stopper still sits flush against the door.
Shake the stopper outside occasionally to remove dust, and spot clean it with a damp cloth when needed. If the cover becomes very dirty, remove the filling and hand wash the cover in cool water. Let it air dry completely before refilling. With basic care, a knitted draft stopper keeps drafts out for many winters.
For a draft stopper that doubles as decoration, knit a cover in a color that matches your curtains or rug. A striped pattern in two colors adds visual interest without any extra skill. You can also knit a simple animal shape, such as a dog or a cat, by adding ears and a tail to the basic tube. A playful stopper makes a cheerful gift for a new homeowner.
Check the stopper each autumn before the cold weather arrives. Fluff the filling and check the seams for wear. A quick repair in early autumn means the stopper is ready when the first cold draft appears.
Like this one? The short list below is built from the same shelf, and How to Knit a Pair of Wrist Warmers with a Thumb Hole is a strong next pick.
Reference: Draft stopper — Wikipedia
Related Articles:
- How to Knit a Pair of Wrist Warmers with a Thumb Hole
- How to Knit a Cowl with a Basket Weave Pattern
- How to Knit a Scarf with a Ribbed Pattern
Tried this project?
Show us how yours turned out in the comments — your version might be exactly the inspiration another maker needs.
If this tutorial helped, share it with a fellow crafter.