
5 min read
Handmade advent calendars with small paper pockets count down the days to Christmas with a daily surprise. Each pocket holds a tiny treat, a note, or a small activity, and opening one becomes a cherished daily ritual. Making your own calendar lets you choose the fillings and match the design to your home. The project is simple and fun for the whole family.
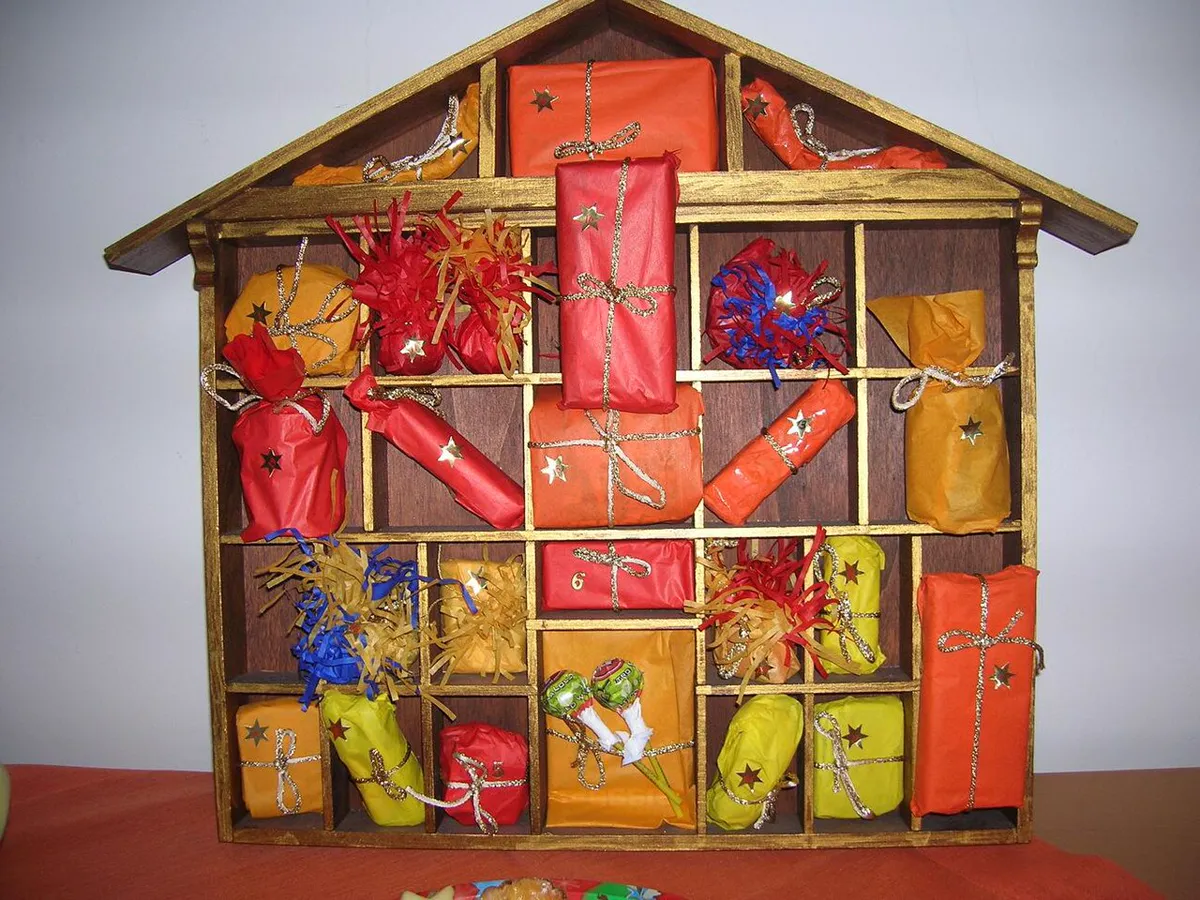
Start with sturdy cardstock or kraft paper for the pockets. Each pocket needs to be large enough to hold a small chocolate, a folded note, or a tiny toy. A pocket about three inches square suits most fillings. You will need twenty-four or twenty-five pockets depending on whether you count down to Christmas Eve or Christmas Day.
Choose paper in festive colors or a single neutral color with colorful numbers. Red, green, and kraft paper all suit a Christmas calendar. Number each pocket clearly so the days can be found in order. Small number stickers, stamps, or handwritten numbers all work well.
Choosing Paper and Numbers
Cardstock between 200 and 300 grams per square meter folds well and holds its shape. Thinner paper sags, while thicker paper is hard to fold neatly. If you use patterned paper, back it with plain card for strength. Test one pocket before cutting the full batch to confirm the paper folds cleanly.
Number the pockets from one to twenty-four or twenty-five, depending on your tradition. Arrange the numbers in a scattered order on the finished calendar so finding each day feels like a small hunt. Keep the numbers large and clear so young children can find them. A mix of number styles adds visual interest.
Folding the Pockets
Fold each pocket from a square of paper by folding up the bottom edge to form a pocket, then folding the sides in and gluing them. A simple envelope-style pocket works well and needs no template. Crease each fold firmly with a bone folder so the pocket holds its shape. A crisp fold makes the pocket look neat.
Secure the side folds with a small amount of glue or double-sided tape. Hold each fold for a few seconds until it bonds. If a pocket feels weak, add a second strip of tape inside the fold. A well-made pocket should hold a small treat without opening.
Arranging the Calendar
Arrange the pockets on a large board, a piece of felt, or a string hung on the wall. A board display keeps the pockets visible and tidy, while a string of pockets adds a rustic charm. Space the pockets evenly so the calendar looks balanced. A grid layout suits a board, while a scattered layout suits a string.
Attach the pockets with pins, clips, or glue, depending on the display method. Clothespins make it easy to remove each pocket after opening, while glue gives a more permanent display. Keep the numbers visible so each day’s pocket is easy to find. Step back and check the overall arrangement before finalizing.
Filling the Pockets
Fill each pocket with a small treat, a note, or an activity suggestion. Chocolates, stickers, and tiny toys are classic fillings. A handwritten note with a kind message or a fun activity adds a personal touch. Vary the fillings so each day feels like a surprise.
Keep the fillings small and light so the pockets do not sag or tear. A pocket that is too heavy will pull away from the display. If a filling is bulky, use a slightly larger pocket for that day. A well-filled calendar balances treats with notes and activities.
Using and Reusing the Calendar
Open one pocket each day from the first of December until Christmas. Make opening the pocket part of a daily routine, such as after breakfast or before bed. The ritual builds anticipation and gives the family a shared moment each day. Children especially enjoy the daily surprise.
Save the calendar after Christmas and refill it next year. Sturdy paper pockets last for several seasons if stored carefully. Replace any pockets that have torn and refresh the numbers if they have faded. A handmade advent calendar becomes a family tradition that grows more meaningful each year.
For a wall display, hang the pockets from a ribbon pinned to the wall. A ribbon display is easy to set up and take down. The pockets hang in a festive row that brightens the room.
Include a few activity notes among the treats. A note suggesting a family walk or a baking session adds variety. Activities create memories that last longer than sweets.
Let children help fill and arrange the pockets. A calendar the family made together feels more special than a store-bought one. Shared making is part of the tradition.
A handmade advent calendar turns the countdown to Christmas into a daily celebration. Each pocket holds a small moment of joy.
Start this December with a simple calendar and grow the tradition year by year. A handmade calendar becomes a family treasure.
Make this year’s advent calendar by hand, and let the countdown begin. Twenty-four small pockets, twenty-four small joys. A handmade calendar is a gift to the whole family. The countdown to Christmas starts with a single pocket. Open one pocket each day, and enjoy the wait.
Your project does not have to end with this page — Nice Christmas Crafts for Adults: Festive DIY Ideas shows a good way to carry it forward.
Reference: Advent Calendar — Wikipedia
Related Articles:
- Nice Christmas Crafts for Adults: Festive DIY Ideas
- Christmas Crafts for Young Adults: Festive DIY Ideas
- Xmas DIY Crafts for Adults: Festive & Fun Ideas
Tried this project?
Show us how yours turned out in the comments — your version might be exactly the inspiration another maker needs.
If this tutorial helped, share it with a fellow crafter.