
5 min read
First paper quilling projects for absolute beginners are a gentle introduction to a craft that turns thin paper strips into beautiful shapes. Quilling needs only paper, glue, and a simple tool, yet the results look delicate and impressive. The basic coils and shapes are easy to learn, and a first project can be finished in an evening. Quilling is a relaxing craft that rewards patience rather than speed.
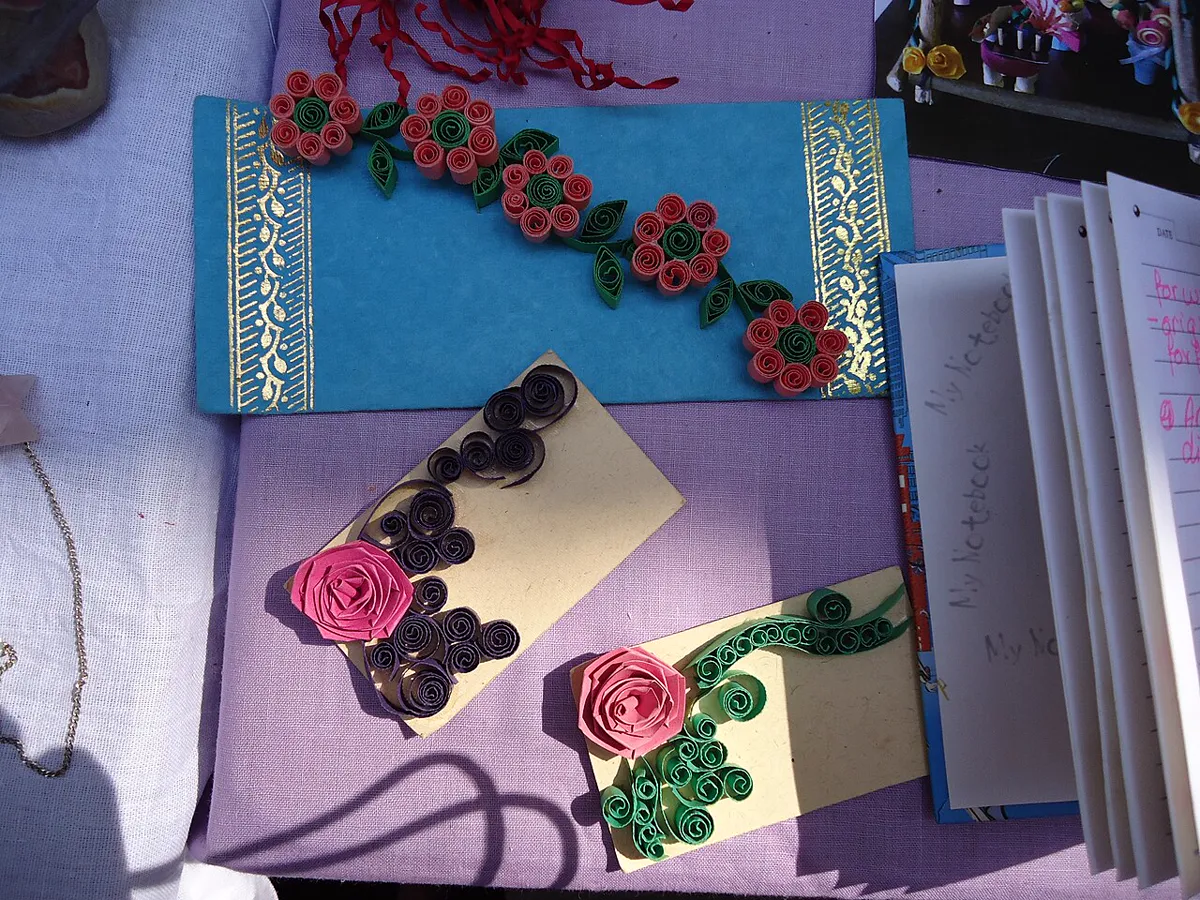
Start with pre-cut quilling strips, which are available in many colors and widths. A width of three millimeters suits small projects, while five-millimeter strips are easier for beginners to handle. Buy a basic quilling tool, which is a needle-like tool with a slot that grips the paper strip. A small bottle of craft glue and a circle template board complete the basic kit.
Choose a simple first project such as a flower card or a heart shape. A project with a few basic coils teaches the core skills without overwhelming you. Keep the design small so it can be finished in one sitting. A finished first project builds confidence for larger work.
Choosing Strips and Tools
Pre-cut strips save time and give consistent results, which matters for beginners. A pack of mixed colors offers plenty of choice for a first project. Avoid cutting your own strips at first, since uneven strips make uneven coils. Once you are comfortable, a quilling fringing machine or a simple paper shredder can cut custom strips.
A slotted quilling tool is the easiest tool for beginners because it holds the strip firmly while you roll. A needle tool gives tighter coils but takes more practice. A circle template board with holes of different sizes helps you make coils of consistent size. A cork board and pins hold shapes in place while the glue dries.
Rolling the First Coils
Insert the end of a strip into the slot of the quilling tool and roll the strip around the tool with steady, even pressure. Keep the coil tight and centered as you roll. When the strip is fully rolled, slide the coil off the tool and let it relax in a circle template hole. The coil will expand to fit the hole, giving a consistent size.
Glue the end of the strip to the coil with a tiny dot of glue. Too much glue makes a mess, while too little lets the coil spring open. Use a toothpick to apply a small, precise dot. Hold the coil for a few seconds until the glue sets, then set it aside to dry fully.
Shaping Coils into Petals
Pinch one side of a loose coil to make a teardrop shape, which is the basic petal shape in quilling. Pinch both sides to make an eye shape, and pinch one side while curving the other to make a leaf shape. These three shapes combine into flowers, leaves, and borders. Practice each shape a few times before starting the project.
Arrange the shapes on a card or a backing board to form the design. A simple flower uses six teardrop petals around a tight coil center. Glue each shape in place with a small dot of glue and hold it until it sets. Work from the center outward so the design stays balanced.
Making a Simple Flower Card
Glue the quilled flower shapes onto a blank greeting card in a small bouquet. Add a stem made from a thin strip of green paper, bent gently into a curve. A few small leaves beside the stems complete the bouquet. Keep the design simple for a first card, since a clean design looks more elegant than a crowded one.
Let the glue dry completely before closing the card or putting it in an envelope. Quilled shapes are delicate, so handle the card gently. A card with quilling is a gift in itself, and the recipient will appreciate the time and care that went into it.
Care and Next Steps
Store quilled projects flat in a rigid box to protect the delicate coils. Keep them away from moisture, since damp paper loses its shape. A framed quilling piece hung on a wall stays safe and looks beautiful. With a little care, quilled work lasts for years.
Once you are comfortable with basic coils, try tighter coils, scrolls, and three-dimensional shapes. Each new shape builds on the same rolling skill. Quilling rewards steady practice, and a first project is just the beginning of a deeply satisfying craft.
For a first three-dimensional project, try a small quilled bowl. Glue tight coils together in a ring, then stack rings to form the bowl shape. A small bowl is a charming container for tiny treasures.
Keep quilling strips organized by color in small envelopes or zip bags. Sorted strips save time when you start a new project. A labeled set of strips makes color choices easier.
Give a quilled card to someone special and watch their reaction. A handmade card often becomes a keepsake. Quilling turns a simple card into something worth keeping.
Quilling is a craft that anyone can learn with a little patience. The basic coil is easy, and the shapes grow from there.
Keep your first quilled project as a reminder of how far you have come. A first coil is a small beginning with a long, lovely road ahead.
Keep this tab open a moment longer: below are more Beginner Crafts articles chosen to follow this one, led by Beginner-Friendly Handmade Gift Crafts for Couples: Easy DIY Ideas.
Reference: Projects — Wikipedia
Related Articles:
- Beginner-Friendly Handmade Gift Crafts for Couples: Easy DIY Ideas
- Beginner Jewelry Crafts for Busy Adults Using Dried Flowers
- Beading Crafts for Beginners: DIY Holiday Gifts Using Pine Accents
Tried this project?
Show us how yours turned out in the comments — your version might be exactly the inspiration another maker needs.
If this tutorial helped, share it with a fellow crafter.